A screenshot which is also known as screen grab or screen capture is a digital image that shows the contents of the computer, laptop or mobile phone display. A screenshot is also created by taking photo of the screen. Here’s how to take a screenshot on Android, Chrome OS, iOS/iPadOS, Linux, macOS, and Windows.
How to take a Screenshot on Iphone/Ipad
iphone
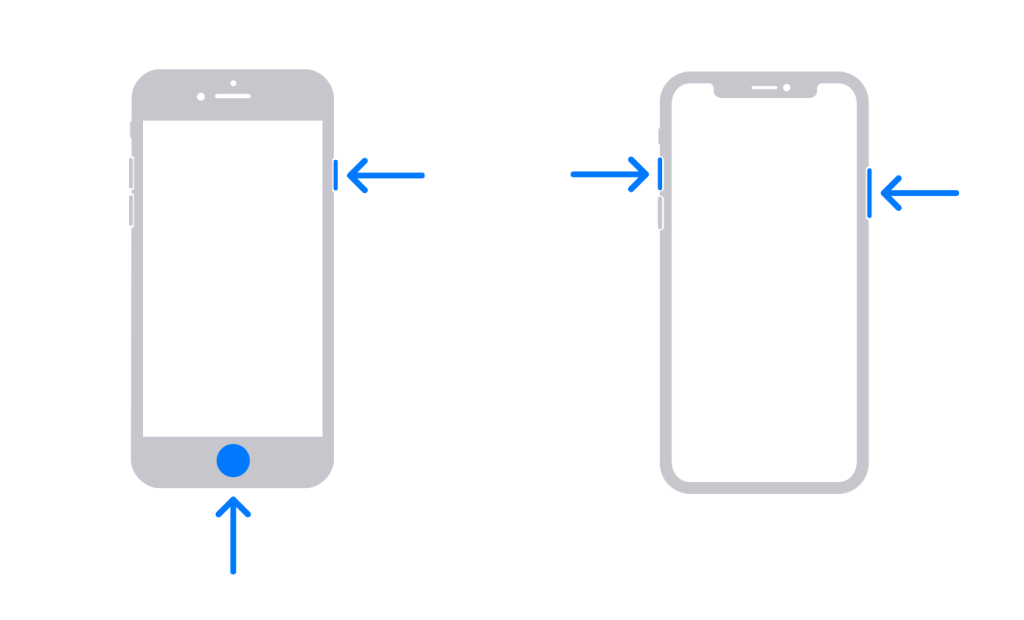
- With Home Button:
If you own an Apple device that has a Home button (like the 2020 iPhone SE), hold down the sleep/wake button and press the Home button to take a screenshot. You will hear a camera shutter (if your sound is on) and see a “flash” on the screen. The screenshot will then appear in your Camera Roll and in the Screenshots album.
- Without Home Button:
For devices without a Home button—the iPhone X and iPhone 11 lines, iPhone XR, and iPad Pro—hold down the side button to the right of the screen (top button for iPad Pro) and the volume up button at the same time.
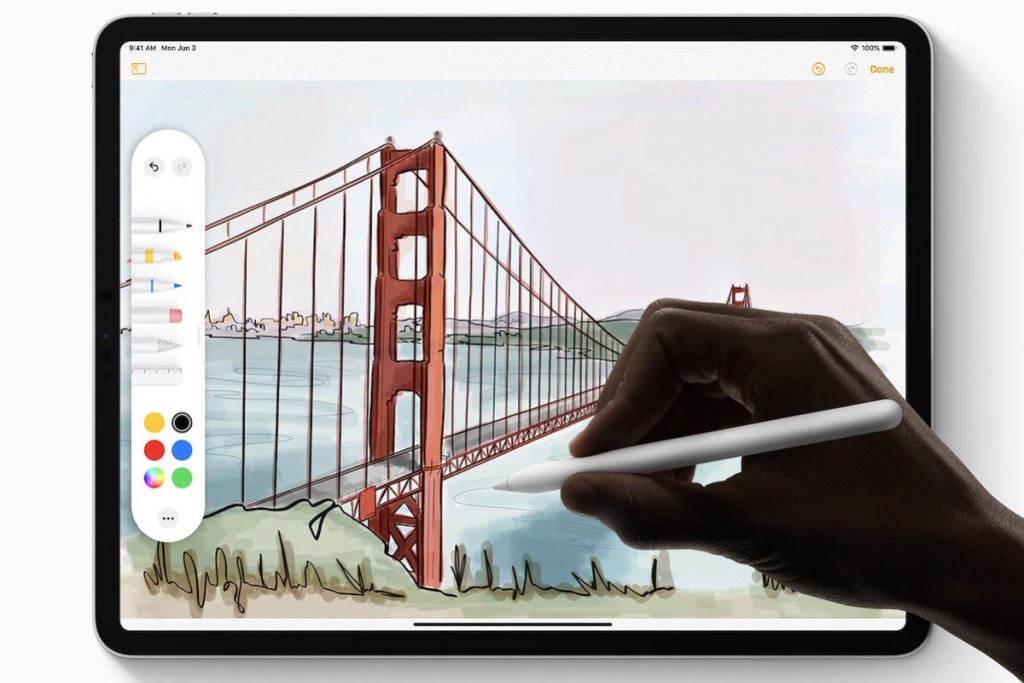
IpadOS
- If you’re using an Apple Pencil with iPadOS, you can take a screen grab with the drawing tool.
- Simply swipe up from the bottom corner of the screen with the Apple Pencil to capture the image.
- You can also choose between just your current screen or the entire page, even after the picture has been taken.
Build- in Screen Recording Tool
- Some apps may make it difficult to take screenshots through the normal means.
- This is where your device’s built-in Screen Recording tool comes in.
- Its primary purpose is to record video of your screen, you can pause the video and take a screenshot this way.

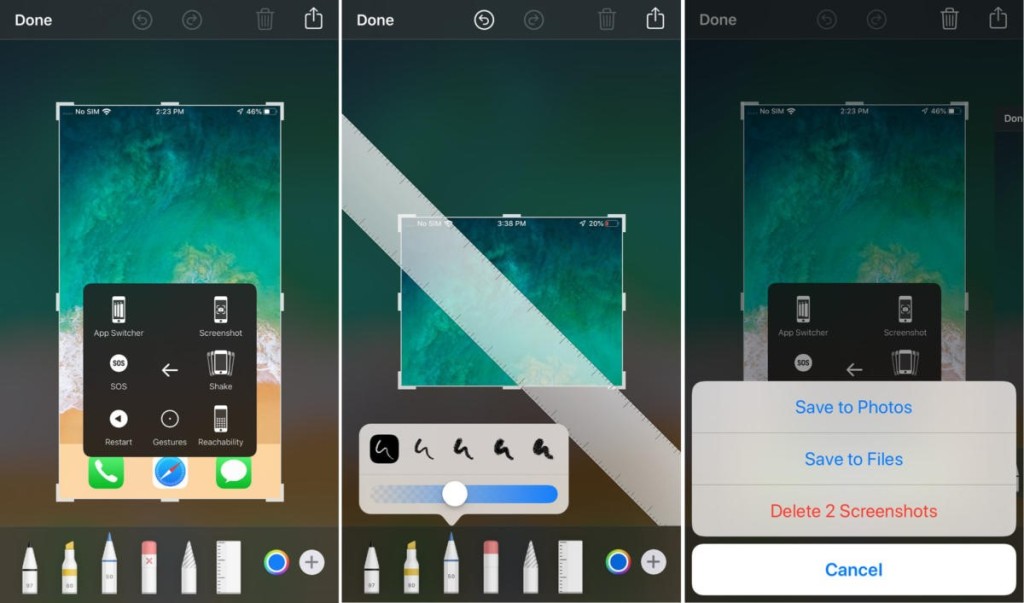
Editing a Screenshot
- If you need to annotate a screenshot, tap the small thumbnail that appears at the bottom of the screen once you capture a screenshot.
- This will open the device’s markup tool and allow you to edit the screengrab.
How to take Screenshot on Android
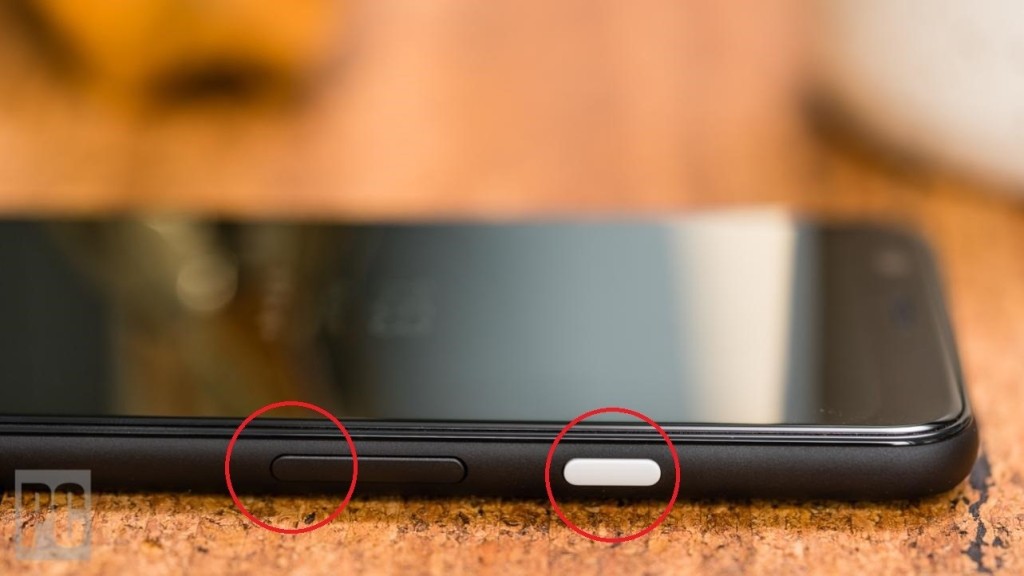
- Most Android devices should be able to take screen grabs by holding down the power and volume down buttons.
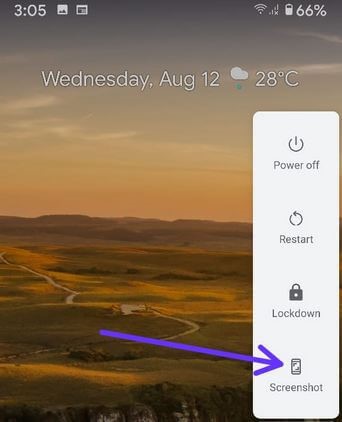
- Devices running Android 10 can also hold down the power button, then select Screenshot from the menu.
- If your phone has Google Assistant or Bixby (Samsung), you can use a voice command to ask the voice assistant to take a screenshot for you.
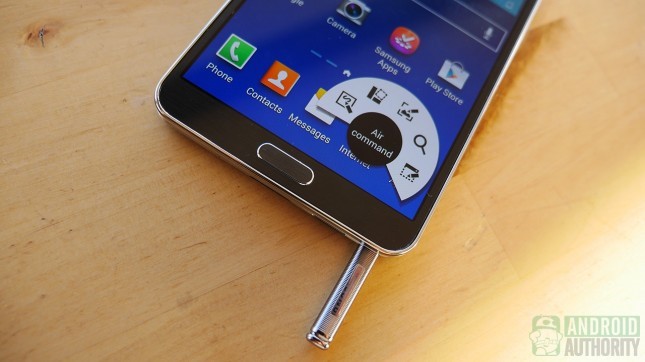
- For Samsung devices with the S Pen stylus, you can take a screen grab from the Air Command menu by tapping Screen Write. You can then write on or crop the image.
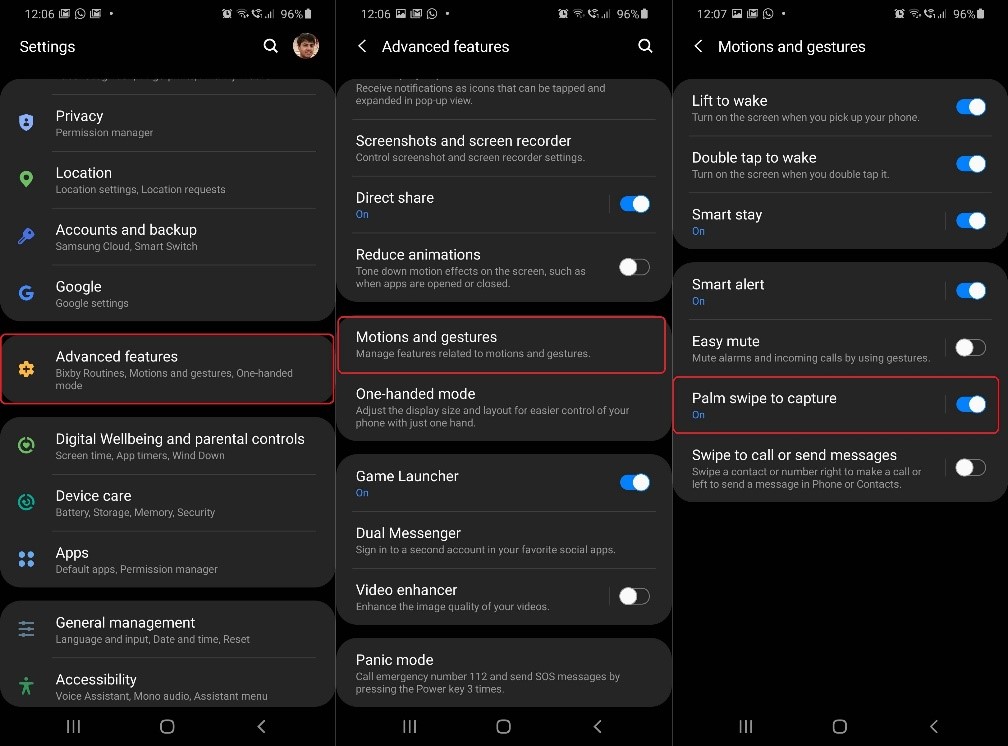
- Samsung phones also support gestures to take screenshots.
- Navigate to the screen image you like, position your hand like you plan to karate chop the phone, then swipe the entire side of your hand along the screen from right to left.
- Set this up (or turn it off) in Settings > Advanced Features > Palm swipe to capture.
How to take Screenshot on Apple Watch
In order to take screenshot on Apple Watch you need to enable the feature first.
- Open the Watch app on your iPhone or iPad, and navigate to My Watch > General > Enable Screenshots and toggle it on.

- Take a screenshot on an Apple Watch by pulling up the screen you want to capture.
- Hold the Side Button and click the Digital Crown simultaneously.

- The screenshot will then appear on your iPhone Camera Roll, not the watch itself.
How to take Screenshot on Wear OS
- Taking a screenshot on your Wear OS device is now much easier than it used to be because you use an app on your phone to do the work.
- Open the Wear OS app, hit the three-dot menu and choose Take screenshot of watch.
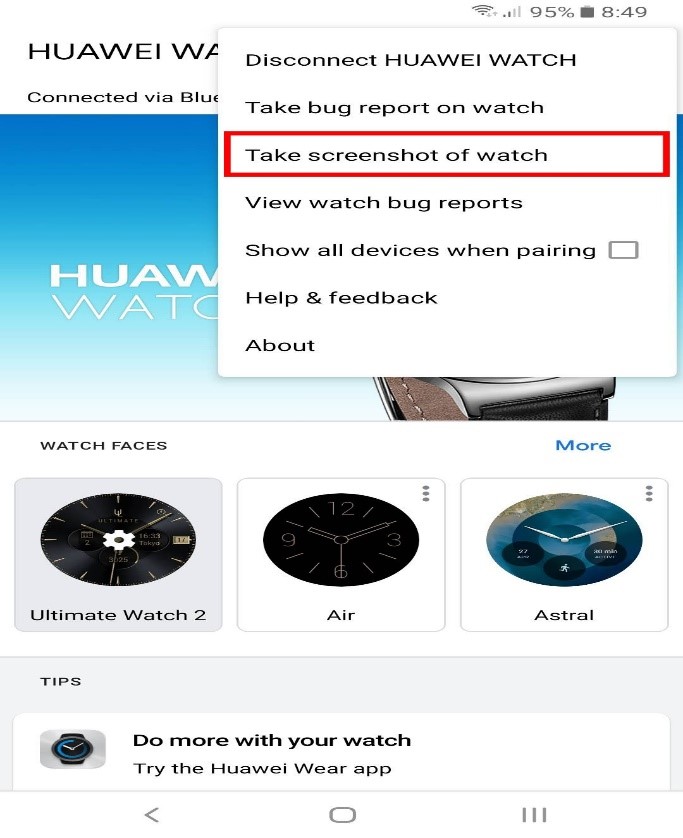
- You will receive a notification on your phone allowing you to save or share the image via the supported apps.
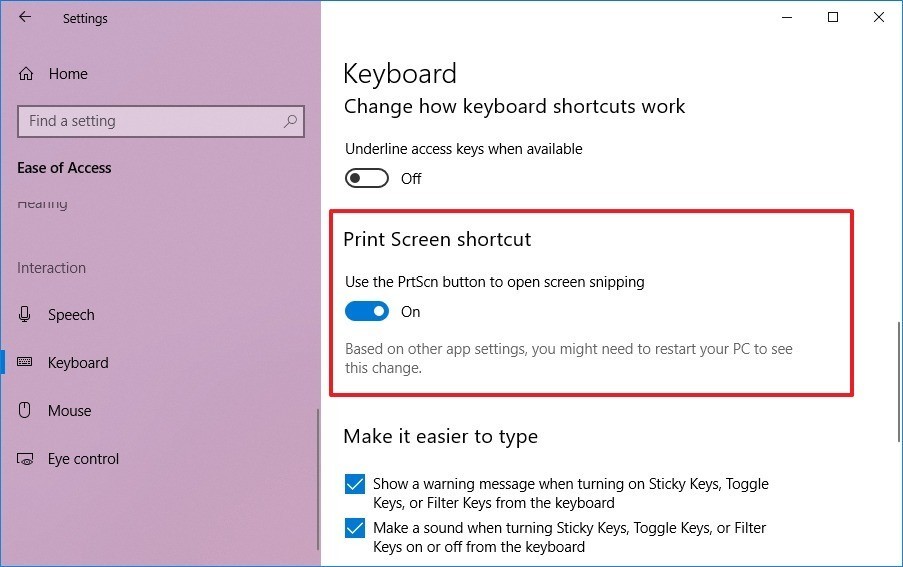
How to take Screenshot on Windows 10
Default way to take screenshot
- In order to take screenshot on your Windows 10 press the Print Screen button on your keyboard.
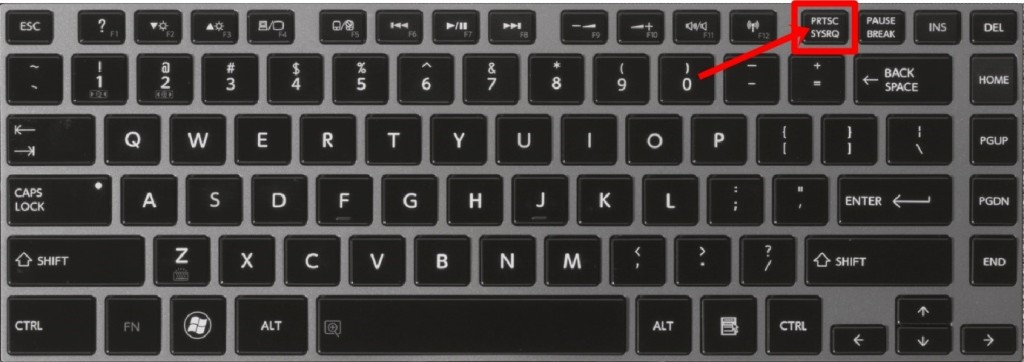
- Windows will just copy the image of your entire screen to the clipboard.
- You can then hit Ctrl+V to paste it into a program, be it a Word document or an image-editing program.
The problem with this method is that it takes the picture of the entire screen and not just the picture you wanted to take screenshot of.
Alt+Print Screen, capture just the window you currently have open and will narrow down the things.
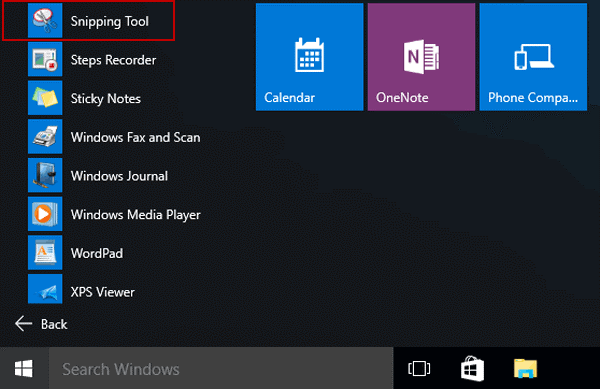
Snipping Tool
- Windows also has multiple built-in tools that can help you take more precise screen grabs.
- The Snipping Tool can be found in the Start menu, which will provide a small toolbar to capture multiple types of screenshots.
- Grab just the area you want with a rectangular capture area, select a specific window to capture, or get the entire screen in one shot.
- Once a screenshot is taken, it is moved to the Snipping Tool editor, where you can save and edit the image.
Snip and Sketch
- This option has been bought in Windows 10 in its updated version in order to replace the snipping tool.
- Launch this program by using the Shift+Windows Key+S keyboard shortcut.
- This will launch a small toolbar at the top of the screen so you can easily choose what to capture.
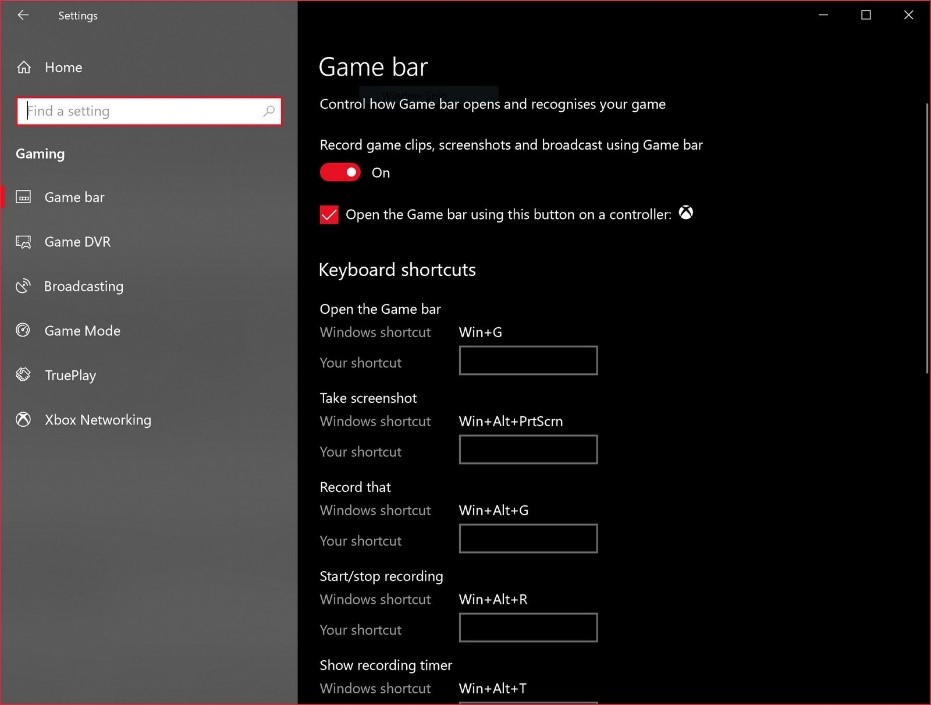
Windows Game Bar
- It can be used to record any action and capture screen grabs.
- Open the tool with Windows Key+S and tap the camera button in the Broadcast & capture section to save a screenshot to the Videos/Captures folder under your main user folder.
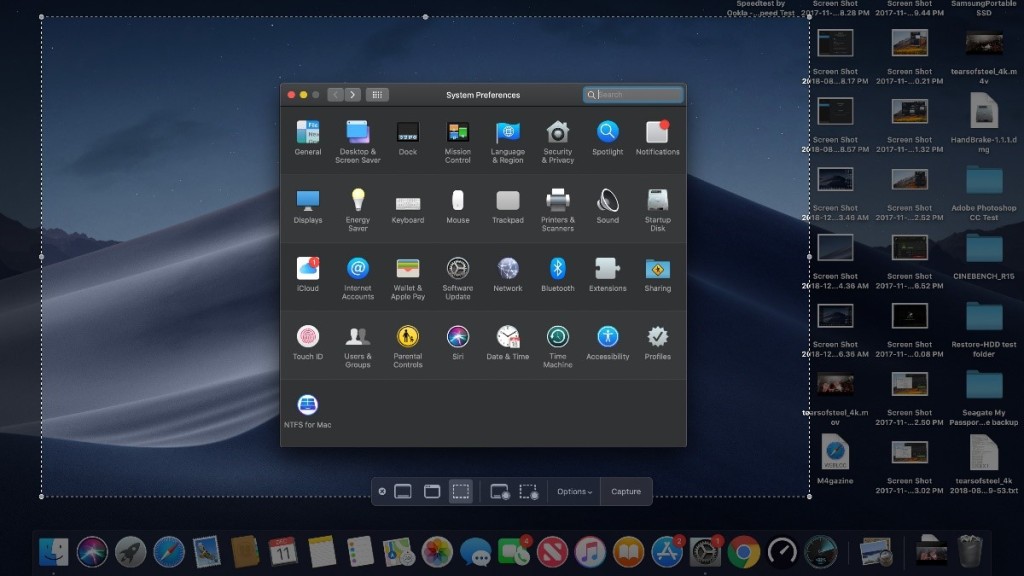
How to take Screenshot on Mac
- The updated version in Mac has made it easier for the users to take a screenshot.
- Press Command+Shift+5, or by navigating to Launchpad > Other > Screenshot.
- The screen capture window allows you to perform different actions.
- Choose to capture the entire screen, part of the screen, or a specific window.
- You can also capture video of the entire screen or just a portion of it, and there’s also the option to take screenshots on a timer and change where images are saved.
Shortcut keys to take screenshot
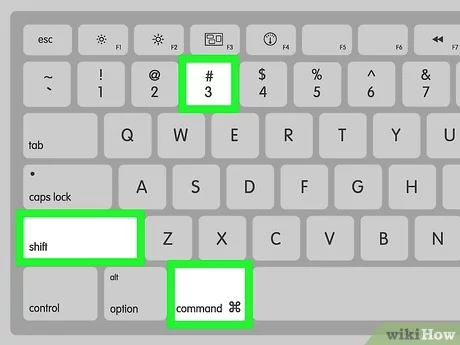
- Command+Shift+3 – capture the entire screen.
- Command+Shift+4 – . If you only want part of the screen captured.
- Command+Shift+5 – If you want to capture a specific window.
- You can then hit the Space Bar to switch between capturing a section of screen and a specific window.
- Command+Shift+6 – if you have a Mac with touch bar.
If you prefer to capture an image to the clipboard instantly, add Control to any keyboard shortcut you use.
- Command+Shift+Control+3 to capture the entire screen.
- Command+Shift+Control+4 for a specific section.
- The image won’t save to the computer, but it can be pasted into an app.
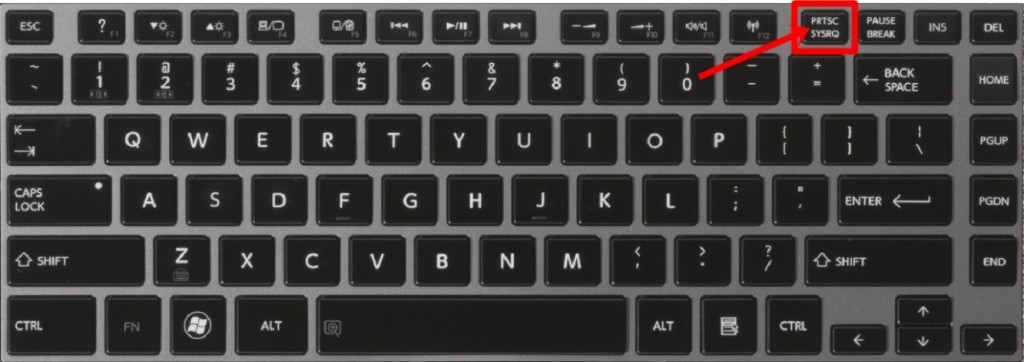
How to take Screenshot on Linux
Default way to take Screenshot
- PrtSc – Save a screenshot of the entire screen to the “Pictures” directory.
- Shift + PrtSc – Save a screenshot of a specific region to Pictures.
- Alt + PrtSc – Save a screenshot of the current window to Pictures.
- Ctrl + PrtSc – Copy the screenshot of the entire screen to the clipboard.
- Shift + Ctrl + PrtSc – Copy the screenshot of a specific region to the clipboard.
- Ctrl + Alt + PrtSc – Copy the screenshot of the current window to the clipboard.
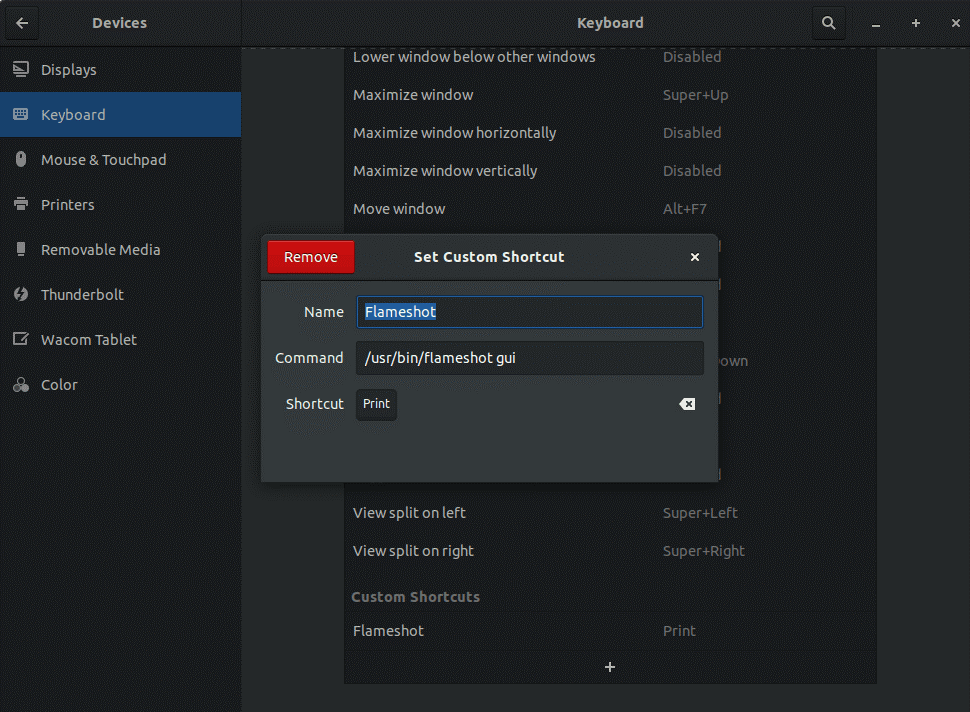
Screenshot with Flameshot
- Head to the system settings and navigate your way to the Keyboard settings.
- You will find all the keyboard shortcuts listed there, ignore them and scroll down to the bottom. Now, you will find a + button.
- Click the “+” button to add a custom shortcut. You need to enter the following in the fields you get:
Name: Anything You Want
Command: /usr/bin/flameshot gui - Finally, set the shortcut to PrtSc – which will warn you that the default screenshot functionality will be disabled – so proceed doing it.
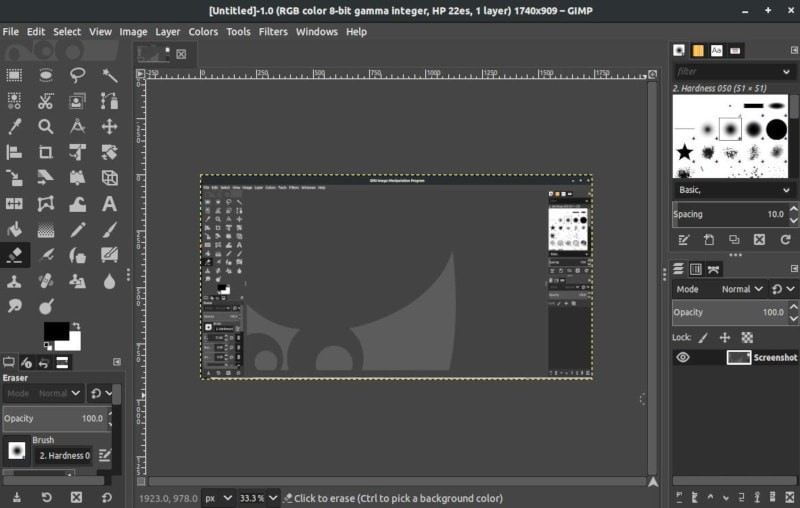
Screenshot with GIMP
- To take a screenshot with GIMP, you need to first launch it, and then navigate your way through File->Create->Screenshot.
- After you click on the screenshot option, you will be greeted with a couple of tweaks to control the screenshot.
- That’s just it. Click “Snap” to take the screenshot and the image will automatically appear within GIMP, ready for you to edit.
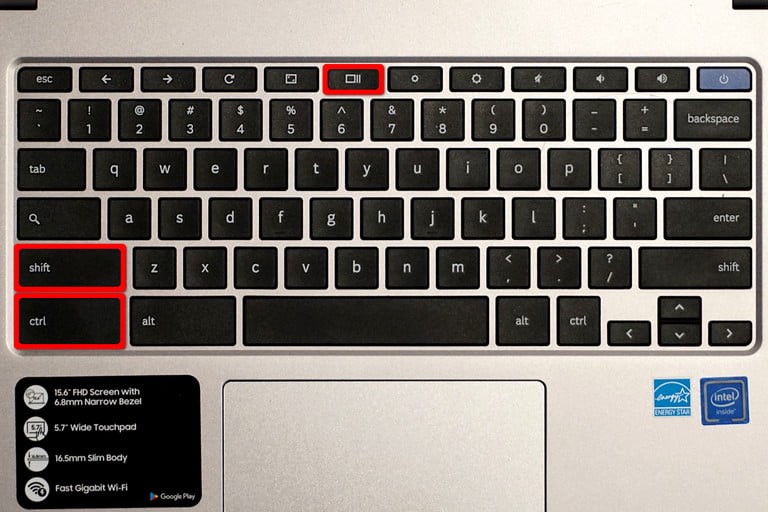
How to take Screenshot on Chromebook
Capturing Full Screen
To take a screenshot of everything on your screen, press the following keys simultaneously: Ctrl + Switch Window.
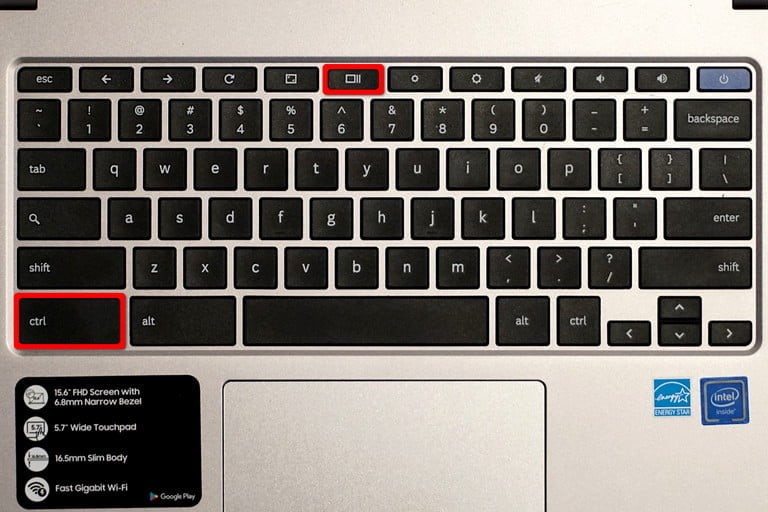
Capturing specific area
You can create a window to capture a partial screen. Here’s how: Ctrl + Shift + Switch Window.